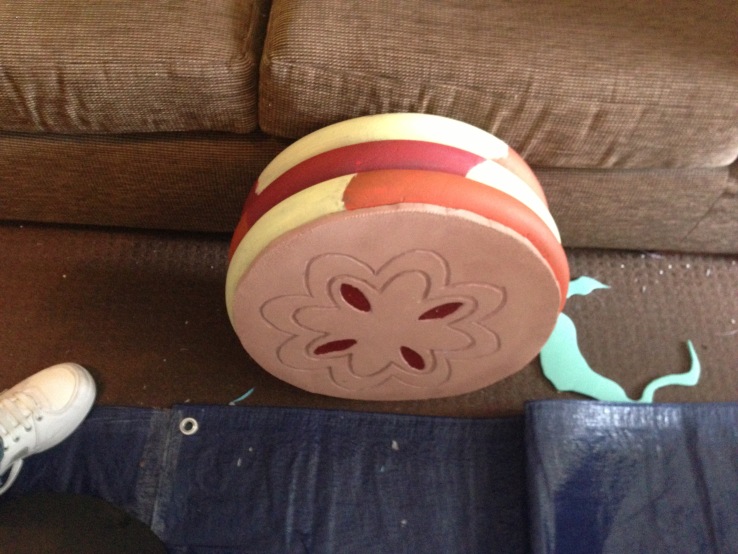
Things i’ve forgot to bring: bonnet detail and “cream Filling”
Things that are not working: Electric Go Kart
Things that seem to be broken: Foam Cart base (is now dragging on the floor)
Oh Crap!!
Things i’ve forgot to bring: bonnet detail and “cream Filling”
Things that are not working: Electric Go Kart
Things that seem to be broken: Foam Cart base (is now dragging on the floor)
Oh Crap!!
The puns are getting worse… I cannot apologise enough
Spoiler Alert!!
No really…I need to make the Spoiler, and fast
The spoiler stems are made from water noodles which were wrapped in sticky back plastic and coloured electrical tape, I then cut holes in the car slightly smaller than the stems so that they would be held in by tension.

the spoiler itself is made from a section of polystyrene painted pink and sandwhiched between 2 pieces of UVA matting that were convenently already the right shade of pink,
as most glues react to polystyrene we used a mixture of silicone and no more nails in order to hold it all together. Holes have been cut in the bottom of the spoiler for the stems to slot into
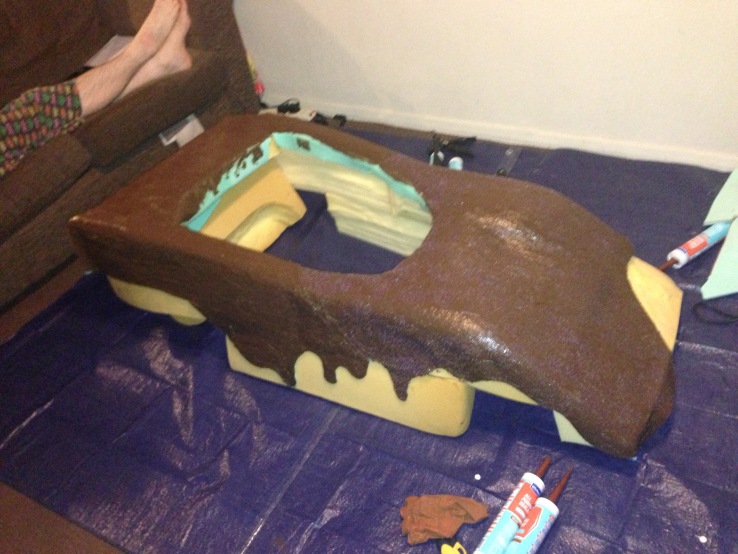
to make the clocolate “splodge” I cut the drip pattern from camping mat foam and coated it in the same brown silicone that I used for the body of the car.
Leaving it to dry overnight and am hoping it has enough time
I have 1 day left and so far i have on my to do list…
Windscreen
Spoiler
Straws
Headlights/Rearlights
bonnet detail
“cream Filling”
seat detail
interior
steering wheel
Needing to cut this list down I have sacrificed the following details as they arent really going to be seen and arent really vital to the look of the car:
seat detail
interior
steering wheel
for the headlights and rearlights I bought some fake security camera domes from the pound shop and sprayed the inside of them with red glass paint, I also put a flashing LED inside so that they light up while I’m driving, I might change these to static LED’s as I think it will look a bit better

the white “mallow” headlight is made from a circular piece of upholstery foam trimmed in a matte fabric, (I think I used an offcut of raw silk)
the windscreen is made from a piece of perspex that has been heated to get a curve, The perspex I’ve used is a bit too thick so I’ve ended up with some ripples…
…Sod it, I’ll fix it later
Mike basicly constructed the base of these whilst i was at work.

He used the thick UVA foam playmats that you can buy in tesco and heat formed them in to a semi-circle and used the same UVA matting as the face to glue it to.

I added the faceplates when i got home and used pipe lagging cut in half to make the tyres. we painted the tyres in a PVA/acrylic mix.

the wheel faceplates are made from a mixture of Funfoam and UVA foam, i then used a dremmal to engrave the detail into the cookie wheels
I (plus a small workforce of family members) spent hours cutting out various stars and sprinkles from multi coloured fun foam, we cut them slightly larger than ideal but with the convention being 2 days away i’m happy to compromise on the scale of the sprinkles in order to get enough to cover the area needed.

Also because nothing would glue to the silicone we needed to figure out a way of attaching the sprinkles to the car…
This could become an issue
For the section of the car that looks slightly purple I studdied the reference images and decided that i wanted wanted to get a “sugary” looking effect.


To do this I decided to top the silicone with milti coloured micro beads. I actually used nail caviar in a few different shades of pink and purple in order to get a shimmery multi tonal effect when photographed but without looking like a harsh obvious line.

I added the microbeads using a salt shaker straight after the silicone so it would stick to it without needing to add more glue, in retrospect this didnt work as well as i hoped and i was shedding beads all over the place, thankfully i had put enough on so that it didnt look patchy in the areas that the beads had brushed off of.
I used an A4 sheet of funfoam as a template for the edges so that even if it did stick to the silicone it would be easy to peel off
Major kudos to my exHusband for helping me with this and for letting me do this in our tiny flat making it stink like wee and vinagar 😦

Wanting to make the frosting look as much like chocolate as possible i opted for brown silicone sealant. We put the silicone on by hand and protected oursenves with rubber gloves and facemasks, i used a huge tarp to protect the carpet and furnature in our flat because this stuff really does get everywhere!

I wasnt as happy with the look of the finished silicone as i thought i would be, I think heat forming vinal may be give a better result 🤔perhaps something to improve on in the future
After throwing a masstve strop over not being able to get the frosting to look right I went to work in a huff and my ex husband took the task of getting this right for me.

he used 2 camping mats (from poundland) glued together with hot glue and heated them with a hot air gun until they were soft, then he molded the edges to drape over the corners as it would do if it was a fondant.
I’ve got to hand him the credit on this part, he done good.
I know I’ve posted this image before but I figured I’d explain the image so you can see how I started the process,
I was originally going to use expanding foam for the body of the car but after discussing the project i realised the best way to replicate the look of sponge cake was to use actual sponge… well in this case old sofa cushions.
So this is how many I got, they were mostly from an old sofa of my mums, they were in quite good condition so with a thorough spray with antibac I was happy to get to work
Using my template, I carved out the begginings of the front of the car to form a rough shape (I thought the bonnet would be the most challenging section to carve so wanted to start here) I used an electric breadknife to get the basic shape and then finnished off with scissors for the minor shape adjustments.
I go driving in my car…
(Posted 2nd July 2013)
I got an electric go-kart base off gumtree for £20, I was originally looking for a pedal powered one but when this one came up for cheap I figured why not! It’s doesn’t actually have handle bars or a steering wheel but instead you steer with your feet and have a little accelerator switch that looks like it would be more at home on a pod racer… O__o
It also doesn’t have much of a frame beyond the back seat and centre bar, (I think my plans may need to be adjusted)

So it’s electric but it does have problems with the batteries so figure once I swap them out it’ll be good to go!! (As it turned out I didn’t bother replacing the battery and everything worked ok)
Next I drew a scale outline of how I wanted the car to look onto lining paper and marked in the size and shape of the go-cart frame
 (I picked up a roll of lining paper in the £1 shop and its the best thing I’ve ever bought)
I used this to see where I needed to add extra hight into the foam and where I needed to cut divets for the framework to sit. This doesn’t need to be perfect but you need a rough idea